
Wide Open Spaces
I still wake up in disbelief that it's done even though my eyes tell me it's real. We moved all our clothes onto a clothing rack in our upstairs bonus room and rearranged furniture to the point of climbing over things to get anywhere. After a month and a half of our belongings flung everywhere, not being able to find exactly the piece of clothing we wanted when we wanted it, and a week sleeping in the guest room, they're both complete.
I did my best to take photos as we went through the process, but sometimes the camera wasn't handy or my excitement of a task completed distracted me from documenting it. But, I think the images I do have will give you an idea of the transformation.
I will preface this entire post with the fact that most of these images were taken with our phones and there are a lot of them!
The entire project started with the idea of having a more functional closet space. We knew that included widening the closet door jam because there were feet of space we couldn't access with clothes in the way. So, with the help of online video tutorials, Gerard set to demolition. Here's how wide each door jamb was before everything started.
Master:

It quickly went from that to this:

to this:

Guest:

This one quickly went from that to this:
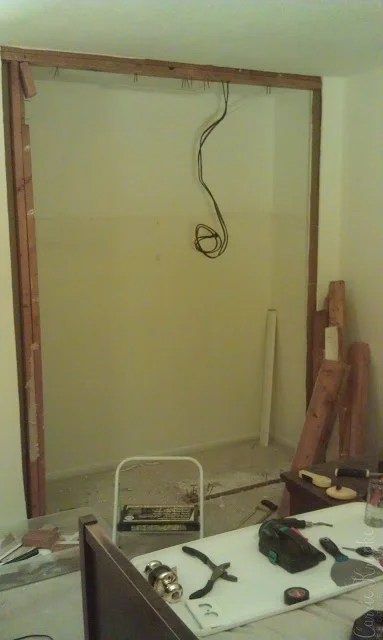
The cords dangling are from the outlet that was in the wall and it's now the power for an in-closet lightbulb.
Here's an overview of what our master room looked like in the midst of it.

To give you an idea of where everything went while Gerard needed space to work, here's a Before shot of our bonus (reading) room where Ella sleeps:

And an After with all our belongings thrown in, poor Ella didn't know what hit her:

If only rebuilding were as quickly done as demolition!
Steps involved from this point included:
1. build the new frame

2. put up drywall

3. mudding the drywall over the course of a week or so, giving the mudding time to dry in between coats and sanding

4. build door jamb
5. tear down old trim around the room
6. install new trim with an awesomely cool (borrowed) miter saw
Guest:

7. paint trim and walls

Gerard put newspaper underneath the trim while painting to protect the carpet in both rooms. When it came to painting the walls it wasn't as easy as picking white. We thought we had the right color for the guest room and it turned out darker than anticipated, so we headed back and tried a second time. The master was right on the first try, thankfully! Guest room is a linen color and the master is a soothing beige. Because we worked to match the wall with a fabric sample from each room, they were custom made and I can't tell you a specific name of either color. Sorry!
8. caulk around trim
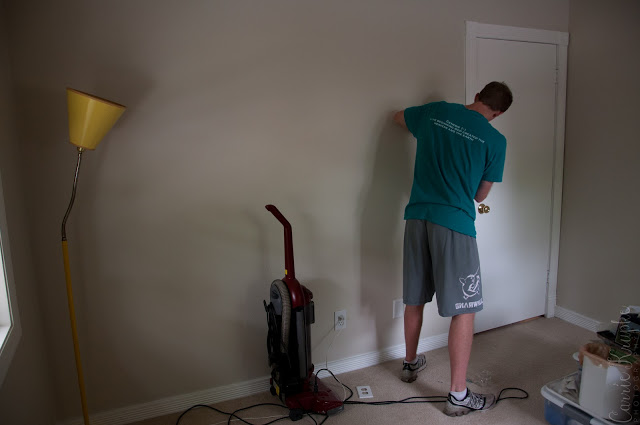
9. install bi-fold doors after painting them
10. Gerard's dad, Dave, helped us measure closet space and plan the closet system
This step happened before the trim in our room and paint in both rooms was complete. Dave visited us 2 weeks before Labor Day weekend and that gave Gerard the deadline for when trim and paint (inside closets and out) needed to be done.

11. install closet system rods & shelves (this image is the master room)

12. MOVE IN! (And move things out!) We were able to fit the contents of both our dressers into the side shelves (on the right of the above photo) so we immediately put up a notice on Facebook and one of our dressers was gone within an hour! The other will stay with the guest room as it matches the bed frame and is more of a family heirloom. But now, we have an incredible amount of floorspace in our room and have been able to fulfill a wish of mine: to have a trunk at the foot of our bed. Don't ask me why, but I've always loved the look of that.
In the process of moving clothes over, we also filled a box for a donation to Goodwill. When you don't have access to your clothes for a month and a half, you realize what clothes you wear most often and which ones really aren't that necessary. And the desire for everything to fit in one space (since that was the goal of the entire project) is so strong, that you're more than happy to part with a few things that are rarely worn. You also find luggage that has holes you didn't realize were there.

So, here's what I'll call IMMENSE PROGRESS for both rooms:
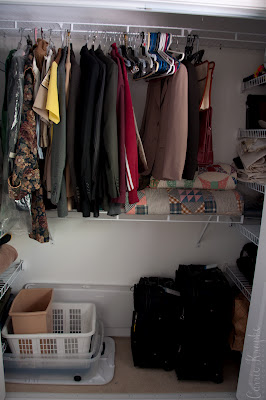
Guest Progress:

The guest room closet houses all of our winter bedding (left shelving), luggage, suits and costumes. See all the extra plastic containers on the bottom? We were able to sort through the clothes that were in there and find better places for them, whether it was Goodwill or our closet. I feel lighter already!

Master Progress: what a transformation two (or three) coats of paint can make!
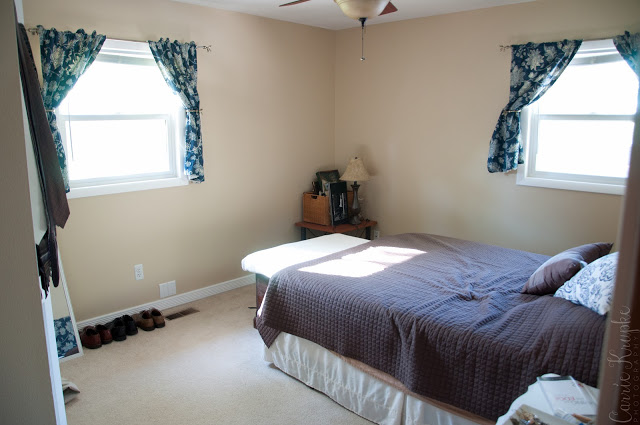


We wanted to keep the verse on the wall as a throwback to our original paint job but needed a frame to...well....frame it. So we'll be painting some decorative trim in whatever spare time we can find and nail-gunning it to the wall. :) We've had wedding photos above our bed the past 4 years but after Gerard's hard work painting, we're thinking really hard before we put any additional nails into the wall. We'll get there eventually!
Since these photos were taken, we've put our laundry basket in the trunk at the foot of our bed and Gerard's shoes fit in there too. I realize our side tables are a mess and not "photo-friendly", but it's definitely progress and when we complete the art hanging, I'll be sure to show you the complete after. :)